Home Bartender’s Guide to Mixology
Welcome to the world of home bartending! Whether you’re a novice or a seasoned mixer, mastering a few basic mixology tips can elevate your cocktail game. In this guide, we’ll explore essential mixology tips for the home bartender. From shaking to layering, we’ve got you covered. Let’s dive in and start mixing like a pro!
Understanding Basic Mixology Techniques
Before we craft our first drink, let’s understand the basics. Shaking, stirring, muddling, and layering are key. Each technique serves a purpose. They blend flavors, chill drinks, and create textures. Knowing when and how to use each method is crucial.
Related Article:
Cocktail Mixology: Mastering Ingredient Pairings in Drinks
The Art of Shaking
Why and When to Shake
Shaking mixes ingredients thoroughly. It’s perfect for cocktails with juices, syrups, or creams. Shaking also chills and dilutes the drink, enhancing its flavor. This mixology tip is a crowd-pleaser and adds a bit of showmanship to your cocktail creations.
Shaking cocktails is more than just throwing ingredients together and giving them a good jolt; it’s an art form that, when mastered, significantly enhances the quality and taste of your drinks. Here are detailed techniques and tips for shaking cocktails effectively:
Choosing the Right Shaker
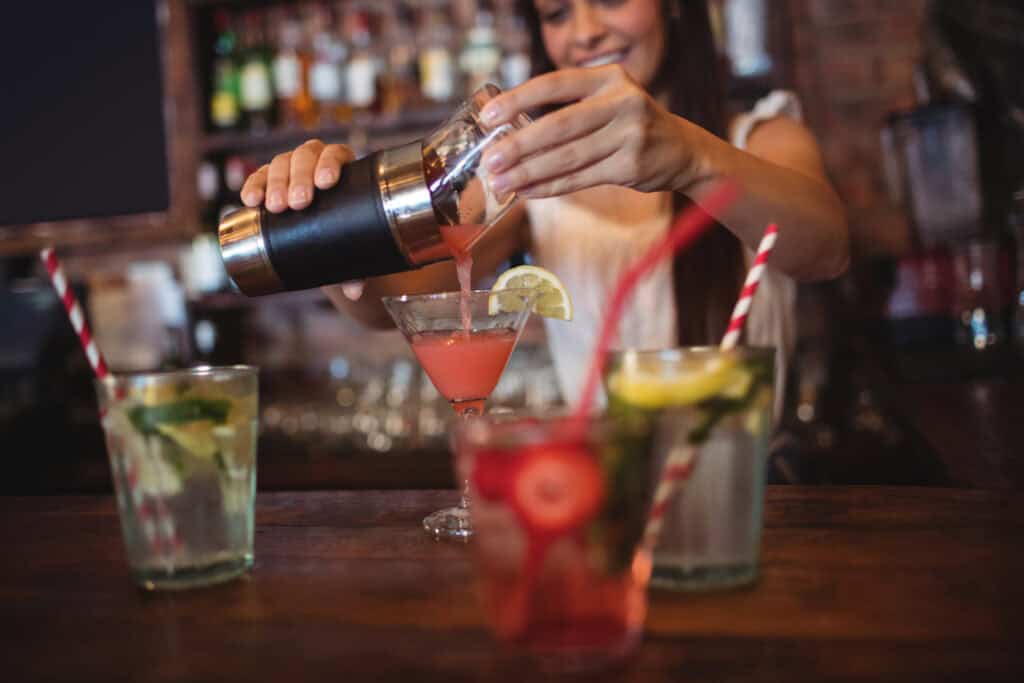


First, select the appropriate shaker. There are three main types:
- Boston Shaker: Consists of two parts, a glass and a metal tin. It’s the choice of most professional bartenders.
- Cobbler Shaker: Has three parts, including a built-in strainer. It’s great for beginners.
- Parisian Shaker: A two-part shaker, similar to the Boston but both parts are metal, offering a stylish option.
Preparing Your Cocktail
- Chill Your Shaker: Before adding your ingredients, fill your shaker with ice to chill it. This step helps cool the shaker, which in turn chills the drink more efficiently.
- Measure Ingredients Carefully: Use a jigger to ensure accurate measurements for a balanced cocktail.
The Art of Shaking
- Add Ingredients: After measuring, add your cocktail ingredients to the shaker. Fill it with ice, aiming for about half to two-thirds full.
- Seal It Tight: Ensure the two parts of the shaker are sealed tightly to prevent leaks.
- Hold It Right: Grip the top and bottom of the shaker with both hands, ensuring a firm hold.
- Shake Vigorously: Shake the cocktail vigorously for about 10-15 seconds. Use a smooth, rhythmic motion. The shake should be hard enough to dilute the cocktail slightly, chill it, and mix the ingredients thoroughly.
- Listen for the Change: You’ll hear the sound of the ice change as the drink cools and dilutes. This is a cue that your cocktail is nearly ready.
- Check the Frost: A well-shaken cocktail will leave a frost on the outside of the metal shaker, indicating it’s sufficiently chilled.
Straining the Drink
- Choose Your Strainer: If you’re using a Boston or Parisian shaker, you’ll need a separate strainer. The Hawthorne and fine mesh strainers are common choices.
- Double Straining: To ensure a smoother cocktail, consider double straining by pouring the drink through a Hawthorne strainer and then a fine mesh strainer. This removes any small ice shards or pulp.
Mixology Tips for Perfect Shaking
- Ice Matters: Use large, cold ice cubes for better chilling and less dilution.
- Shake for Texture: Shaking is especially important for cocktails with juices, dairy, or eggs, as it creates a silky texture and integrates the ingredients fully.
- Be Mindful of Dilution: Over-shaking can lead to excessive dilution, altering the flavor and strength of your cocktail. Time your shakes to maintain the cocktail’s integrity.
Cocktail Examples That Benefit From Shaking
- Margarita: The classic combination of tequila, lime juice, and triple sec demands vigorous shaking to blend the flavors and achieve the perfect frothiness.
- Daiquiri: Shaking a Daiquiri integrates the rum, lime juice, and syrup, while achieving the right temperature and dilution.
- Cosmopolitan: Shaking integrates the vodka, cranberry juice, and lime beautifully.
- Whiskey Sour: Shakes the whiskey, lemon juice, and syrup into a smooth, frothy delight.
By mastering the technique of shaking, you’re not just mixing ingredients; you’re breathing life into your cocktails, ensuring they’re cold, well-mixed, and deliciously inviting.
Mastering Stirring Mixology Tips
Why and When to Stir
Stirring gently mixes the drink. It’s ideal for strong, spirit-forward cocktails. This method prevents over-dilution and maintains clarity.
Stirring is a fundamental technique in mixology, primarily used for cocktails that are composed entirely of spirits or very clear ingredients. The goal of stirring is to cool and dilute the drink while maintaining its clarity and smoothness. Here’s a deep dive into the techniques and tips for effectively stirring cocktails:
Selecting the Right Tools
- Mixing Glass: A large, sturdy glass or a specialized mixing glass is essential for stirring cocktails. It should be wide enough to allow free movement of the stirrer.
- Bar Spoon: A long-handled bar spoon is crucial. Its length reaches to the bottom of tall mixing glasses, and its spiral design aids in the smooth stirring action.
Preparing Your Cocktail
- Chill the Glass: Begin by chilling your mixing glass. Filling it with ice while you gather your ingredients can help.
- Measure Accurately: Use a jigger to measure your ingredients precisely. Accuracy is key to a balanced cocktail.
The Technique of Stirring
- Adding Ingredients: Pour the ingredients into the mixing glass. For most stirred cocktails, you’ll start with the spirits and then add any vermouths or lighter liquors.
- Filling With Ice: Add plenty of ice to the mixing glass, filling it just over halfway. Large, cold ice cubes are preferable as they melt slower, reducing the risk of over-dilution.
- The Stir: Insert the bar spoon into the mixing glass, resting it against the inside wall. Use your fingers to gently rotate the spoon around the outside edge of the glass. The motion should be smooth and consistent. Aim to move the ice as a single mass, rather than crashing it around.
- Duration and Speed: Stir the cocktail for about 30 to 45 seconds. The goal is to chill the drink and achieve slight dilution without making it watery. The correct speed is steady and deliberate, not rushed.
Tips for Perfect Stirring
- Silence is Golden: A well-stirred cocktail is done quietly. The ice should glide around the glass without clashing.
- Control Dilution: Pay attention to the texture and temperature of the drink as you stir. Stop once you’ve reached the desired dilution and chill.
- Strain Properly: Use a Julep or Hawthorne strainer to pour the cocktail into the serving glass. For extra clarity, you can also double strain through a fine mesh sieve to catch any ice shards or bits of herbs.
Cocktail Examples That Benefit From Stirring
- Martini: A classic example where stirring ensures the drink remains crystal clear while being perfectly chilled and diluted.
- Manhattan: Stirring melds the whiskey, vermouth, and bitters smoothly, maintaining the cocktail’s rich, clear appearance.
- Negroni: Stirring integrates the gin, Campari, and sweet vermouth evenly, resulting in a smooth, balanced cocktail.
Mastering the art of stirring is essential for any home bartender aiming to create elegant, spirit-forward cocktails. It’s a technique that values precision over flair, emphasizing the cocktail’s clarity, smoothness, and balance. With practice and attention to detail, your stirred cocktails will not only look professional but taste sublime too.
The Muddle Method
Why and When to Muddle
Muddling releases essential oils and flavors from fresh ingredients. It’s great for cocktails with herbs or fruit.
Muddling is a crucial technique in mixology, used to release the essential oils, juices, and flavors from fresh ingredients like fruits, herbs, and spices directly into the cocktail. Proper muddling can significantly enhance the depth and complexity of your drinks. Here’s how to master the art of muddling:
Choosing the Right Muddler
- Material: Muddlers are commonly made from wood, stainless steel, or plastic. Wooden muddlers are traditional and work well for gently bruising herbs without shredding them. Stainless steel and plastic muddlers often have a flat base and are more durable and easier to clean.
- Size: Your muddler should be long enough to comfortably reach the bottom of your mixing glass or shaker without your hand hitting the rim.
Preparation and Technique
- Prep Your Ingredients: Before muddling, roughly chop or segment larger fruits to expose more surface area. For herbs, a gentle clap between your hands can help release their oils before adding them to the glass.
- Add Ingredients to the Glass: Place the ingredients to be muddled in the glass or shaker first, before adding ice or liquid ingredients. This prevents dilution and ensures direct contact with the base for efficient flavor extraction.
- Gentle Yet Firm Pressure: Position the muddler in your dominant hand and press down on the ingredients with a twisting motion. The goal is to crush the fruits or bruise the herbs to release their flavors, not to pulverize them into a pulp.
- Muddle in the Right Container: Use a sturdy glass or a shaker tin that can withstand pressure. Avoid muddling in a glass with a thin bottom to prevent breakage.
Muddling Mixology Tips
- Herbs: When muddling herbs like mint or basil, be gentle to avoid releasing bitter flavors from the stems. You’re aiming to express the essential oils, not tear the leaves to bits.
- Sugar: If you’re muddling ingredients with granulated sugar, the sugar acts as an abrasive to help extract juice and flavor.
- Layering Flavors: For cocktails that involve both herbs and fruits, muddle the fruits first to extract their juice, then gently muddle the herbs on top to release their aroma without over-extracting.
- Cleanliness: Ensure your muddler and work area are clean, as muddling can get messy. Rinse your muddler immediately after use to prevent stickiness or residue.
Cocktail Examples That Benefit From Muddling
- Mojito: Muddling mint leaves with sugar and lime juice is essential to create this refreshing classic.
- Caipirinha: The Brazilian national cocktail requires muddling lime and sugar to meld the tart and sweet flavors before adding cachaça.
- Old Fashioned: A traditional approach involves muddling a sugar cube with bitters and a splash of water before adding the whiskey.
Muddling is a simple yet impactful technique that can elevate your cocktails from good to great. It allows you to experiment with a range of fresh ingredients, adding layers of flavor that bottled mixers can’t match. With practice and a mindful approach, you’ll be able to intuitively muddle ingredients to perfection, ensuring your cocktails are bursting with fresh, vibrant flavors.
Related Article:

Mix’n – Muddling Fresh Fruit for a Summer Cocktail: Raspberry Spritzer with felənē® vodka